Well its true - and all that steel I purchased well over a year ago is going to go to some good use.
http://www.harwoodperformance.bizland.com/1941buick/index.html
http://www.harwoodperformance.bizland.com/1941buick/Rotisserie(rev.2).pdf
There were a lot of things I liked about how this appears to go together.. and it had a materials list which I've stuck to about 80%... You'll see the differences later.
First things first... The steel. I purchased it from State Steel- here in Des Moines. They were pretty good to work with overall, but the one thing I would mention is that the steel comes in long lengths. To cut it warrants a 10-15 dollar fee for each cut. When I purcahsed my first load I opted to cut it with a HACKSAW myself, and it was a huge pain. Guys in the warehouse actually had bets on how long it would take me to get through all the material. Let's just say I did it faster than most said I could... especially driving a minivan with plates that say SNKMPIE.
Lesson learned- take a trailer that can handle long lengths... or just pay the man.
Second-
Cut the long lengths into each of the pieces needed for the rotisserie. My recommendation here is to try to cut the larger pieces first... then wait on some of the smaller gussets/details... as I've changed mine up a little as I've went along. But - mostly - especially with the bases, I've been very close to the plan.
Third -
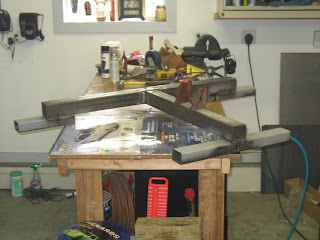
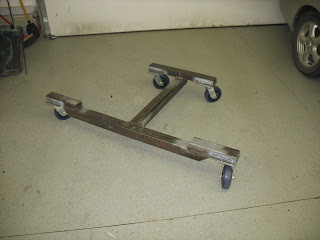
The bases. Here are some shots of the bases. One with casters (from Harbor Freight - about $13 a piece when maxing out the discount) and one without.
Here's one with casters - on the floor.
Note the 45 degree cuts on the inside of the wheels closest to the cam. What I found was the wheels when rotating came into contact with the frame.
I found that the 2x3 rectangle tubing didn't exactly accommodate my casters... so I had to expand the footprint with some angle steel. See below
Here's the finished product.
I really liked how these allowed me to really dial in the welder and see how much penetration things would take. In the end - the holes lined right up.
Once the bases were constructed it was time to figure out how to accommodate the upright sections on the rotisserie. In the original design, the vertical adjustability is handled at the end of the pivot point where a 2 inch section of square tubing is capable of being pinned in multiple locations to adjust the height. Honestly - this probably would have done a fine job for me as well, but I've seen other rotisserie models on-line and elsewhere with some vertical travel controlled as well by a hydraulic cylinder. I really liked the idea, so I invested in two 8 ton cylinders and a 24 foot stick of 3.5 inch square tube to sheath the already cut 3 inch tube.
Here's a shot of the cylinder - think two 8 ton rams is enough? Yeah. Me too.
Above/Below - here are two shots of the construction of the rotating pin assemblies. These consist of a one piece of 3.5 inch .375 wall DOM tubing and a two foot piece of 2.75 OD .25 ID DOM tube.
I bought these from http://www.onlinemetals.com/.
Trouble with these pieces I found...was that the math would indicate that these should fit inside one another. Unfrotunately, that wasn't the case at all. I spent three nights grinding, sanding, smoothing, and finishing the work on the inside tube on my pal Shane's belt sander so that it would fit inside the outer. SO glad that is done. Next time I'll hedge a 16th of an inch to get the pieces to fit together.
At this point - I've been having a lot of fun working with the HTP welder. The unit has been great up to this point, and after about a year I had a couple things that caused me some issue. One call to HTP, and they had two new parts to me free of charge and things have been great since. The great thing about welding thicker material - is that its more forgiving. With some practice, welds definitely improve.
Oh - and weld-though primer. That stuff is worth the money as well.
Next up - drilling holes in the rotating pin. Plus fitting the hydraulic cylinders. Beginning the home stretch.


No comments:
Post a Comment