In all actuality I likely could have simply looked to seal the metal a bit and gone on my merry way. I didn't exactly like this and I knew that by opening up the torque boxes (to cut out the rotted metal) I could get some exposure to inside of the boxes so I could look to take care of any lingering rust - hopefully sealing up things better than they were at the factory.
I was able to cut out the rotten stuff and put things back together fairly well. (once I found the 14 gauge steel that isn't sold off the shelf at Menards, Home Depot, or other)
I didn't get shots of how scaly things were originally, but I can definitely say that opening these things up made a lot of sense. I'm glad I did it, and I also found a couple locations where I saw light shining through pin holes in the fender wells that I was able to weld closed from the inside fo the torque box.
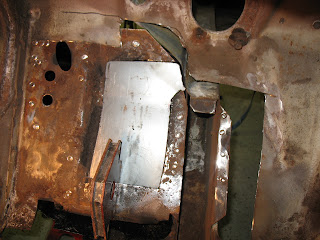
Here's a shot of the patch panel mocked in place with a magnet. This is going to be the first time using the new welder in any large capacity. And a butt weld to boot.
So after welding and painting, here's a shot of the torque box all burned in - the welds didn't turn out as nice as I had hoped, but its strong, and this view should never be seen again - so my learning is the welder was more important in this case.
Here's the bottom piece mocked into place. The big thing to notice here is that the emergency brake cable is typically snaked through the torque box here, and I've elminated that hole. I would much rather run the E brake from the console if I can or to run no E brake at all. We'll see.
Here's a little closer view of the same spot - with the plug weld holes drilled (glad I splurged on the drill press now!)
Below is a shot of the passenger side. The cabin facing side of the torque box was in good shape. The same can't be said for the vertical aspect of the box and the underside. I ended up cutting a lot of the underside out, (welding upside down was a (sarcastic) BLAST). Here's a shot of the small vertical piece being mocked in.
I will attempt to post some pics of the underside of the passenger side torque box - unfortunately this is the only one I have from my camera. With these things buttoned up, it was time to move into fixing the firewall.


