Saturday, January 16, 2010

A little experiment for Brynn and I - De-rusting the hood

I wanted to go work on the car and Brynn wanted to hang with daddy - so inspired by an early morning watching of Sid The Science kid, we decided to do a science experiment with daddy's new gallon of Eastwood Acid Etch Gel.


Here's the surface I'm working with - painted with a light film of rust and a rusty dust covering the metal.


Our sample... masked off and slathered with the gel.  The directions indicate that it works best when the temp is 70 and above.  I'm not going to be near that with it at -5 outside.... but I was able to get it to 55 for our exercise. 

What I found with this stuff - is that it does like to slowly dry out.  After about an hour - I took Margery's plastic wrap out and covered the location so that it would keep as much moisture as possible.  It mad quite a bit of difference.


Here's the spot after three hours.  Pretty impressive if you ask me .  I scrubbed it down with a scotch brite and some cleaning solution.. .and was left with this.  Not too shabby!  Now I need to do the rest of the car!

It does appear that the rust is coming from underneath the paint a bit... so I may need to de-rust, strip paint, then de-rust again.  We'll see.

Will it run? - Carb rebuild

Now its time to start the process of seeing what there is to work with from a fuel and fuel delivery perspective.  I had already unhooked the gas tank early on a couple months ago so since it didn't drain much I figured the tank was probably pretty empty.


Once the screws that hold the tank in were removed, the tank came right out.  Manuals show some putty/sealer in the seam between the trunk and the tank- but if it was there, it was long since deteriorated.  The void left by the tank is seen above.


Here's the mouth looking into the tank.  The picture doesn't do it much justice, but when looking into the tank it does look okay on the inside.  I purchased a small telescoping mirror that I will use to look beyond the view seen here.  But - since I'm not there yet, that task can wait.


So - I've always thougth of gasoline as being somewhat a light golden/yellow color.  That's not de-icer in that jug - thats what I dumped out of the tank.  Nice it game out to be just about a gallon.  Wow - if any of this junk is in the carb- then I'm in trouble.


Next step is the carb.  Dad came over and we both walked through the disassembly of the two barrel carb.  We stopped by the Arnold Motor Supply store here in town and picked up the handy-dandy carb cleaner bucket in the picture above.  Lucky me - the carb pieces just barely fit in the can. 

I didn't get any pictures of the inside of the carb - but wow - the bowl in that sucker looked like it hadn't seen a drop of fuel in a LONG time.


Here's the carb sitting in the can - it put out a pretty bad smell.  After huffing it for an evening I woke up super sick the next morning.  Next time the mask is going on for work like this.  It works great though... the solvent melts off all the junk that was on the carbuerator.  With this and an old toothbrush - things cleaned up well.


After cleaning and reassembly - here's the finished result.  Nice and SHINY.

So - the big question - does the car run once its got fuel and spark (I checked) - will the car run?  Interestingly enough - the answer is yes... and IT RUNS pretty well.  There's a little bit of top-end chatter, but past that, the car does start, warm up, and rev.  The carb definitlely could use some tuning - but knowing that the old 302 runs and feels good... it says a lot.  I tried to put it into gear earlier - and it didn't want to go into drive or reverse - so there may be some issues with the auto transmission.  Oh - well - I'll probably go with a manual transmission anyway.

A little more disassembly

The windshield of the car does have a slight scratch in it due to some severely worn wiper blades.  So - I decided I would work on the trim around the windsheild, the wiper arms, and the cowl behind the hood.  I wondered what I would find under that cown with regards to decay/rust.


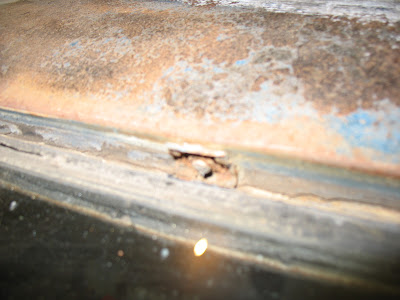
So -you read on-line that removing the windsheild trim is a huge pain.  Talking to some friends as well they've echoed this.  So - I followed all the direction that people had and went to the local parts store and bought the special tool for the job.... and ended up only using it as a pry to lift the trim up.  The tabs (one of which shown above) are so tight that I had to use my pick set to get in and pull the tabs loose.  The tool just wouldn't get behind the tabs.

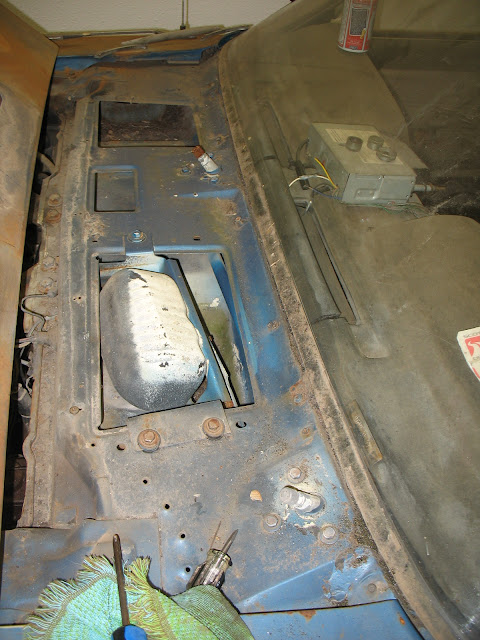
After removing al the trim and exposing the drain behind the hood.  It looks like its in pretty good shape! 


Here's a view of the windshield with all the trim gone and the job done.  Oh - before going on to something different - the wiper arms.  They were on there pretty tight - and prying on them looked like it would probably damage the steel behind the hood.  So - what worked for me was to use a larger vice grip and clamp it just under the wiper arm.  Then - simply pry against the vice grip (versus the steel sheet metal) with a screwdriver on each side of the post.  They popped right off.